Cakes and Pastries Recipes

Lemon Blueberry Cake Recipe

Lemon blueberry cake

Lemon Blueberry Cake is a delicious cake with a refreshing lemon flavor and sweet bursts of blueberries. This recipe allows you to make a homemade cake from scratch that is perfect for any occasion. Whether you’re celebrating a special event or simply want to impress friends and family with a delightful dessert, this Lemon Blueberry Cake will do just that.

Ingredients

  • 3 cups (375 g) all-purpose flour
  • 1 tablespoon baking powder
  • 1/2 teaspoon baking soda
  • 1/2 teaspoon salt
  • 1 cup (227 g) unsalted butter, softened
  • 2 cups (400 g) granulated sugar
  • 4 large eggs, room temperature
  • 1/4 cup (60 ml) lemon juice
  • 1 tablespoon lemon zest
  • 1/2 cup (120 ml) milk
  • 1 cup (150 g) fresh blueberries

Instructions

  1. Preheat the oven to 350°F (175°C) and grease two 9-inch (23 cm) cake pans with butter, then lightly dust with flour.
  2. In a large bowl, whisk together the flour, baking powder, baking soda, and salt. Set aside.
  3. Using an electric mixer, cream together the butter and granulated sugar until light and fluffy, about 2-3 minutes.
  4. Add the eggs one at a time, beating well after each addition.
  5. Stir in the lemon juice and lemon zest until well combined.
  6. Gradually add the flour mixture and milk, alternating between the two, beginning and ending with the flour mixture. Mix on low speed until just combined.
  7. Gently fold in the blueberries with a rubber spatula.
  8. Divide the batter evenly between the prepared cake pans.
  9. Bake for 25-30 minutes or until a toothpick inserted into the center of the cakes comes out clean.
  10. Allow the cakes to cool in the pans for 10 minutes before transferring them to a wire rack to cool completely.
  11. Once the cakes are completely cooled, you can fill and decorate them as desired.

Conclusion:

Lemon Blueberry Cake is a refreshing and sweet treat that is perfect for a summer day or special occasion. With this recipe, you can easily create a homemade cake that will impress everyone who tastes it. So gather your ingredients and start baking this delicious Lemon Blueberry Cake from scratch!

Lemon Blueberry Cake Recipe Read More »

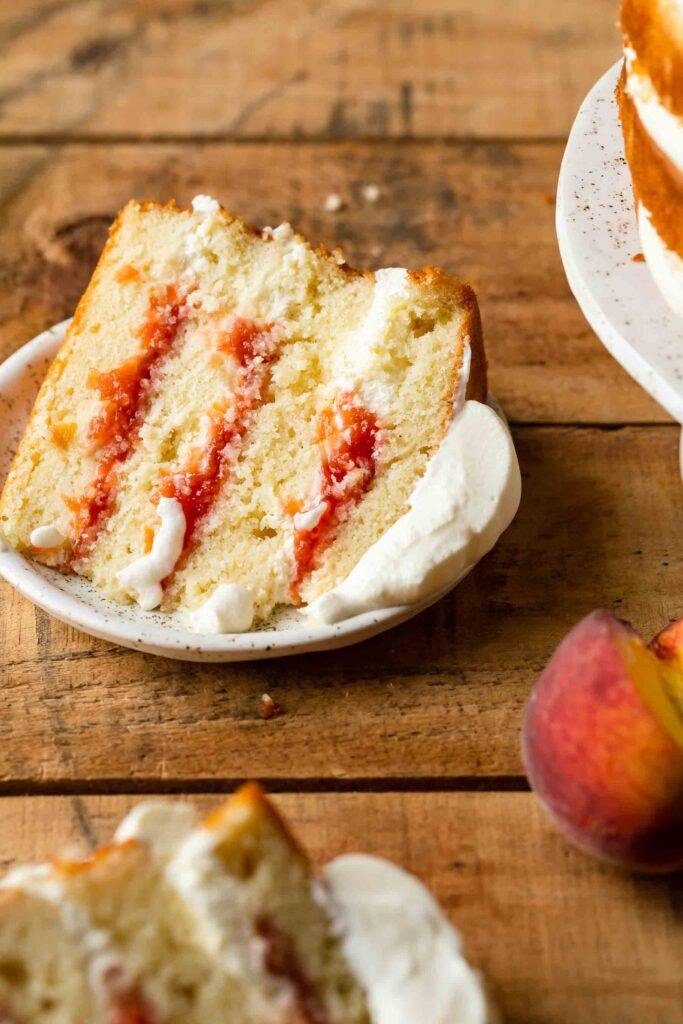
Peaches and Cream Cake Recipe: A Summertime Delight

From: Peaches and Cream Cake Recipe

As the warm days of summer approach, it’s time to celebrate the abundance of fresh and juicy peaches. What better way to enjoy this delightful fruit than in a luscious Peaches and Cream Cake? This recipe, crafted with love and expertise, combines the sweetness of ripe peaches with the indulgence of a creamy cake. Each bite is a tantalizing blend of fruity goodness and velvety textures, making it the perfect dessert to savor during the sunny season. In this article, we’ll delve into the mouthwatering Peaches and Cream Cake recipe from Also The Crumbs Please, and discover how to create a delightful treat that will leave your taste buds craving for more.

Ingredients:

  • 2 ½ cups all-purpose flour
  • 2 ½ teaspoons baking powder
  • ½ teaspoon salt
  • 1 ½ cups unsalted butter, softened
  • 2 cups granulated sugar
  • 4 large eggs
  • 2 teaspoons vanilla extract
  • 1 cup sour cream
  • 4 large ripe peaches, peeled, pitted, and diced

Instructions:

  1. Preheat your oven to 350°F (175°C) and grease and flour a 9×13-inch baking pan.
  2. In a medium-sized bowl, whisk together the flour, baking powder, and salt. Set aside.
  3. In a large mixing bowl, cream the softened butter and granulated sugar until light and fluffy.
  4. Add the eggs, one at a time, beating well after each addition. Stir in the vanilla extract.
  5. Gradually add the dry ingredients to the butter mixture, alternating with the sour cream. Begin and end with the dry ingredients, mixing until just combined.
  6. Gently fold in the diced peaches, ensuring they are evenly distributed throughout the batter.
  7. Pour the batter into the prepared baking pan, spreading it evenly.
  8. Bake for approximately 40-45 minutes, or until a toothpick inserted into the center of the cake comes out clean.
  9. Once baked, remove the cake from the oven and allow it to cool completely in the pan on a wire rack.
  10. Once the cake has cooled, you can enjoy it as is or take it to the next level by adding a dollop of whipped cream and a sprinkle of cinnamon on top.
  11. Slice and serve the Peaches and Cream Cake, relishing in the delightful combination of moist cake and juicy peaches.

Conclusion:

Indulge in the exquisite flavors of a homemade Peaches and Cream Cake, a dessert that showcases the essence of summer. This recipe allows you to revel in the sweetness and juiciness of ripe peaches, combined with a tender and creamy cake base. Whether you’re hosting a gathering or simply treating yourself to a scrumptious dessert, this Peaches and Cream Cake is sure to impress. So grab some fresh peaches, roll up your sleeves, and embark on a culinary adventure that will delight your senses and leave you craving for more.

Peaches and Cream Cake Recipe: A Summertime Delight Read More »

Fresh Cherry Cake Recipe from Scratch: A Burst of Summery Delight

When it comes to capturing the essence of summer in a dessert, few things can rival the delightful combination of fresh cherries and a moist, homemade cake. If you find yourself yearning for a sweet and fruity treat, look no further than the enticing Fresh Cherry Cake, a recipe crafted from scratch. Bursting with the vibrant flavors of juicy cherries, this cake is a true celebration of the season’s bounty. From the moment you take a bite, the lusciousness of the cherries, combined with the tender crumb of the cake, will transport you to a sunny orchard on a warm summer day. Whether you’re hosting a backyard barbecue, attending a potluck, or simply craving a delectable dessert, this Fresh Cherry Cake is guaranteed to impress. So, let’s dive into the recipe and embark on a culinary adventure that will leave your taste buds singing with joy.

Ingredients:

  • 2 cups fresh cherries, pitted and halved

Instructions:

  1. Preheat your oven to 350°F (175°C) and grease a 9-inch (23 cm) round cake pan.
  2. In a medium-sized bowl, whisk together the flour, baking powder, and salt. Set aside.
  3. In a separate large mixing bowl, cream the butter and granulated sugar together until light and fluffy.
  4. Add the eggs, one at a time, beating well after each addition. Stir in the vanilla extract.
  5. Gradually add the dry ingredients to the butter mixture, alternating with the milk. Begin and end with the dry ingredients, mixing until just combined.
  6. Gently fold in the fresh cherries, ensuring they are evenly distributed throughout the batter.
  7. Pour the batter into the prepared cake pan, spreading it evenly.
  8. Bake for approximately 45-50 minutes, or until a toothpick inserted into the center of the cake comes out clean.
  9. Once baked, remove the cake from the oven and allow it to cool in the pan for 10 minutes. Then transfer it to a wire rack to cool completely.
  10. While the cake is cooling, you can prepare a simple glaze or frosting of your choice to enhance its flavors. Optionally, you can also dust the cake with powdered sugar before serving.
  11. Slice and serve the fresh cherry cake, savoring each moist and fruity bite.

Conclusion:

Indulge in the irresistible flavors of Fresh Cherry Cake, a homemade treat that captures the essence of summer. This recipe allows you to savor the natural sweetness and juiciness of fresh cherries in every bite. With its moist texture and delightful taste, this scratch-made cherry cake is a perfect dessert option for any occasion or gathering. Enjoy the taste of summer with this delectable treat!

Fresh Cherry Cake Recipe from Scratch: A Burst of Summery Delight Read More »

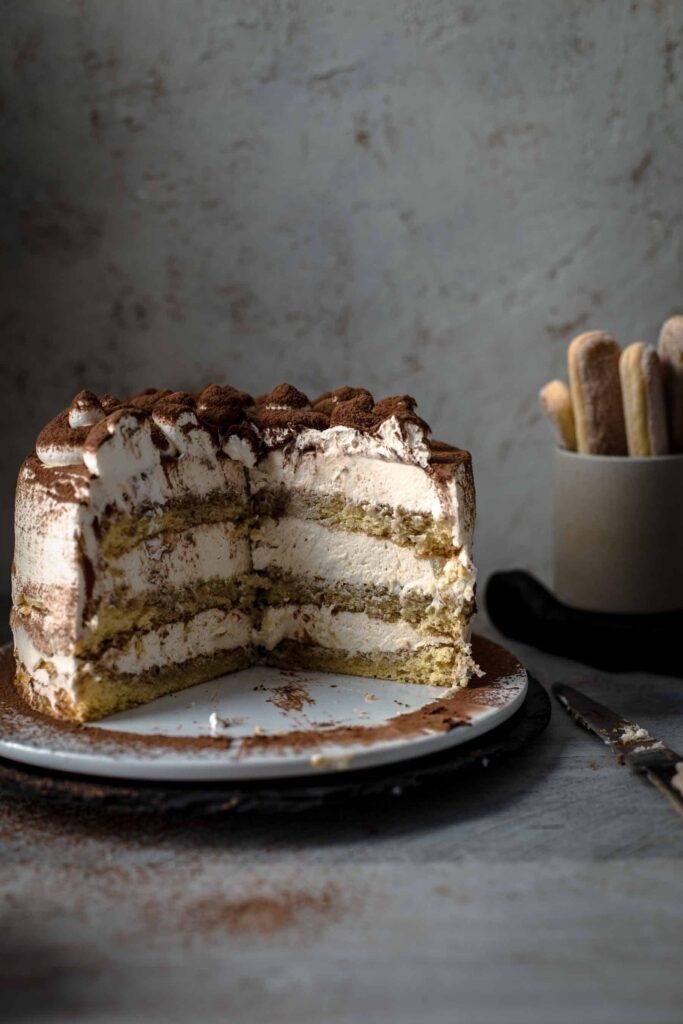
Tiramisu Cake Recipe – A Delicious Twist on a Classic Dessert

Indulge in the irresistible flavors of a homemade Tiramisu Cake. This delightful twist on the classic Italian dessert combines layers of tender sponge cake, rich coffee-soaked ladyfingers, and a luscious mascarpone cream filling. In this article, we’ll guide you through the step-by-step process of creating this delectable dessert that will impress your family and friends. Get ready to savor every heavenly bite of this Tiramisu Cake!

Ingredients:

For the Cake:

  • 2 cups all-purpose flour
  • 2 teaspoons baking powder
  • 1/2 teaspoon salt
  • 1/2 cup unsalted butter, softened
  • 1 cup granulated sugar
  • 3 large eggs
  • 1 teaspoon vanilla extract
  • 1 cup whole milk

For the Coffee Soaking Syrup:

  • 1/2 cup strong brewed coffee
  • 2 tablespoons granulated sugar
  • 2 tablespoons coffee liqueur (optional)

For the Mascarpone Cream Filling:

  • 2 cups mascarpone cheese
  • 1 cup heavy cream
  • 1 cup powdered sugar
  • 1 teaspoon vanilla extract

For the Cocoa Dusting:

  • 2 tablespoons unsweetened cocoa powder

Instructions:

  1. Preheat your oven to 350°F (175°C). Grease and flour two 9-inch round cake pans.
  2. In a medium bowl, whisk together the flour, baking powder, and salt. Set aside.
  3. In a large mixing bowl, cream together the softened butter and granulated sugar until light and fluffy. Add the eggs one at a time, beating well after each addition. Stir in the vanilla extract.
  4. Gradually add the dry ingredients to the butter mixture, alternating with the milk. Begin and end with the dry ingredients, mixing until just combined.
  5. Divide the batter equally between the prepared cake pans. Smooth the tops with a spatula and bake for 25-30 minutes, or until a toothpick inserted into the center comes out clean.
  6. While the cakes are baking, prepare the coffee soaking syrup. In a small saucepan, combine the brewed coffee and granulated sugar. Heat over medium heat until the sugar dissolves. Remove from heat and stir in the coffee liqueur, if desired. Set aside to cool.
  7. Once the cakes are done baking, remove them from the oven and let them cool in the pans for 10 minutes. Then transfer them to a wire rack to cool completely.
  8. To make the mascarpone cream filling, beat the mascarpone cheese, heavy cream, powdered sugar, and vanilla extract together in a mixing bowl until smooth and creamy.
  9. To assemble the Tiramisu Cake, place one cake layer on a serving plate. Brush the top with the coffee soaking syrup, ensuring it is evenly moistened.
  10. Spread a generous layer of the mascarpone cream filling over the soaked cake layer. Place the second cake layer on top and repeat the process, brushing with the coffee syrup and spreading the mascarpone cream filling.
  11. Dust the top of the cake with unsweetened cocoa powder using a fine-mesh sieve.
  12. Refrigerate the Tiramisu Cake for at least 4 hours, or overnight, to allow the flavors to meld and the cake to set.
  13. When ready to serve, slice the cake into portions and enjoy the perfect balance of flavors and textures in each bite.

Tiramisu Cake Recipe – A Delicious Twist on a Classic Dessert Read More »

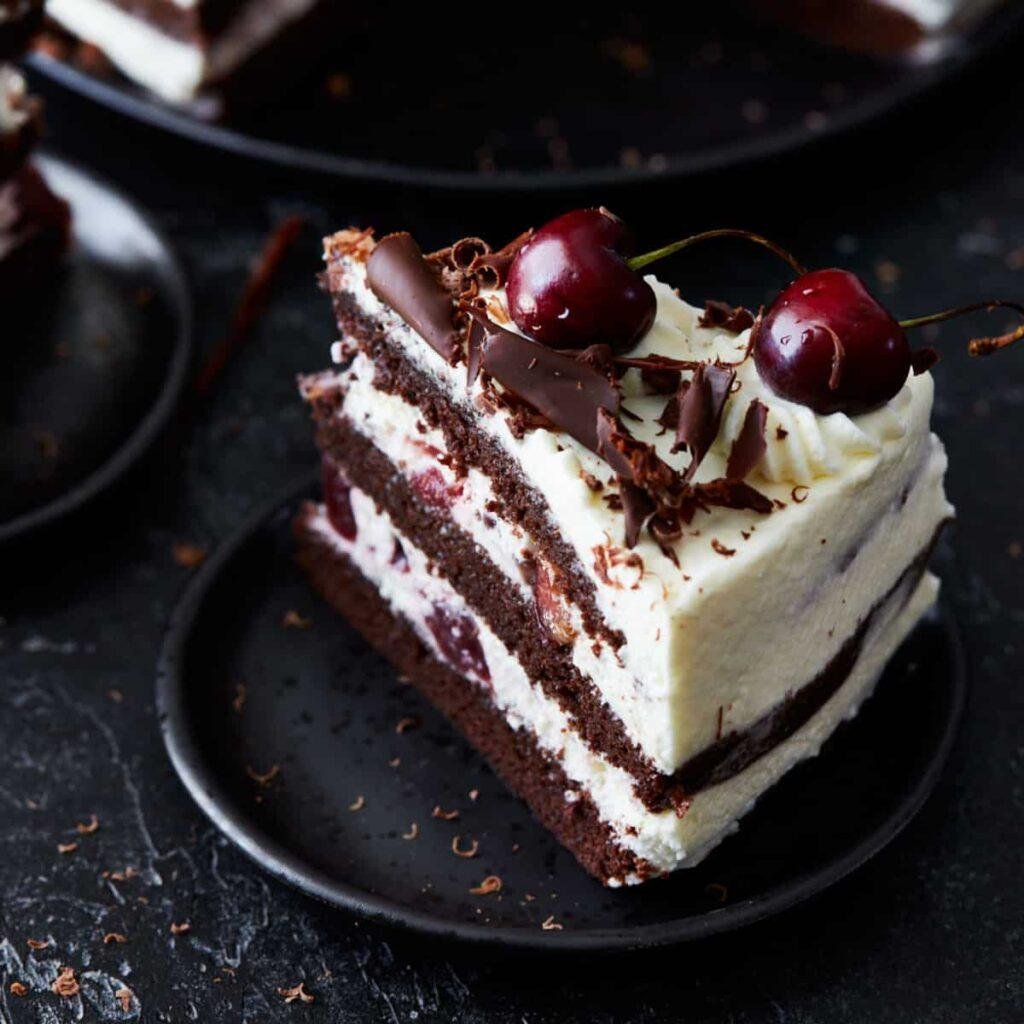
The Perfect Recipe for an Authentic Black Forest Cake

Indulge your senses in the rich, timeless delight of an Authentic Black Forest Cake. This classic German dessert, with its layers of moist chocolate cake, luscious cherries, and decadent whipped cream, has captivated dessert enthusiasts for generations. In this article, we’ll guide you through a step-by-step process to create your very own show-stopping Black Forest Cake that is guaranteed to impress your family and friends. Get ready to embark on a journey of pure chocolatey bliss!

Ingredients:

For the Chocolate Cake:
  • 2 cups all-purpose flour
  • 1 3/4 cups granulated sugar
  • 3/4 cup unsweetened cocoa powder
  • 1 1/2 teaspoons baking powder
  • 1 1/2 teaspoons baking soda
  • 1 teaspoon salt
  • 2 large eggs
  • 1 cup whole milk
  • 1/2 cup vegetable oil
  • 2 teaspoons vanilla extract
  • 1 cup boiling water
For the Cherry Filling:
  • 4 cups pitted cherries (fresh or frozen)
  • 1/2 cup granulated sugar
  • 1/4 cup water
  • 1 tablespoon lemon juice
  • 2 tablespoons cornstarch
  • 1/4 cup cold water
For the Whipped Cream Frosting:
  • 4 cups heavy whipping cream
  • 1/2 cup powdered sugar
  • 2 teaspoons vanilla extract
For Assembly and Garnish:
  • Additional cherries, for decoration
  • Chocolate shavings or curls

Instructions:

  1. Preheat your oven to 350°F (175°C). Grease and flour three 9-inch round cake pans, and line the bottoms with parchment paper for easy removal.
  2. In a large mixing bowl, combine the flour, sugar, cocoa powder, baking powder, baking soda, and salt. Whisk together until well combined.
  3. Add the eggs, milk, vegetable oil, and vanilla extract to the dry ingredients. Mix on medium speed for about 2 minutes, until the batter is smooth.
  4. Reduce the speed to low and slowly pour in the boiling water. Mix just until combined. The batter will be thin, but that’s okay.
  5. Divide the batter evenly among the prepared cake pans. Smooth the tops with a spatula and tap the pans on the counter to release any air bubbles.
  6. Bake for 25-30 minutes, or until a toothpick inserted into the center of each cake comes out clean. Remove the cakes from the oven and let them cool in the pans for 10 minutes. Then transfer them to a wire rack to cool completely.
  7. While the cakes are cooling, prepare the cherry filling. In a medium saucepan, combine the cherries, sugar, water, and lemon juice. Bring the mixture to a simmer over medium heat.
  8. In a small bowl, whisk together the cornstarch and cold water until smooth. Gradually pour the cornstarch mixture into the simmering cherry mixture, stirring constantly.
  9. Continue to cook the cherry filling until it thickens, about 2-3 minutes. Remove from heat and let it cool completely.
  10. To make the whipped cream frosting, chill a mixing bowl and beaters in the freezer for 15 minutes. Then pour the heavy whipping cream, powdered sugar, and vanilla extract into the chilled bowl.
  11. Using an electric mixer, beat the cream on medium-high speed until stiff peaks form. Be careful not to overbeat.
  12. Once the cakes have cooled, level the tops if necessary. Place one cake layer on a serving plate and spread a generous amount of whipped cream over the top.
  13. Spoon a layer of the prepared cherry filling over the whipped cream, spreading it evenly. Place another cake layer on top and repeat the process, adding whipped cream and cherry filling.
  14. Finally, place the third cake layer on top. Use the remaining whipped cream to frost the sides and the top of the cake, creating a smooth and even layer.
  15. To decorate, pipe rosettes or dollops of whipped cream along the edge of the cake. Place fresh cherries on top of each dollop. For an added touch, sprinkle chocolate shavings or curls over the whipped cream and cherries.
  16. Refrigerate the cake for at least 4 hours, or overnight, to allow the flavors to meld and the cake to set.
  17. When ready to serve, slice the Black Forest Cake with a sharp knife, revealing its beautiful layers of chocolate cake, cherries, and cream. Each bite will transport you to dessert heaven.

Conclusion: With this detailed recipe, you now have the knowledge and confidence to create an authentic Black Forest Cake in the comfort of your own kitchen. Whether it’s for a special occasion or a delightful indulgence, this cake is sure to impress and satisfy. So gather your ingredients, embrace your inner pastry chef, and get ready to savor the heavenly combination of chocolate, cherries, and whipped cream in every delectable slice. Enjoy the delightful journey of creating and enjoying your very own Authentic Black Forest Cake!

The Perfect Recipe for an Authentic Black Forest Cake Read More »